2023-03-08
Setting up a remote NAS with Tailscale to manage my photo archives
Keywords: NAS, Synology, Tailscale, Lightroom, Plex, photos, backups, infrastructure Just one of the many photos in my backlog: sunrise at Las Torres
del Paine
Just one of the many photos in my backlog: sunrise at Las Torres
del Paine
As a fresh victim of the recent tech layoffs, I suddenly found myself with a lot of time to work on hobby projects. One hobby I have recently been neglecting is photography. Shooting the photos was never the issue, but sorting and editing them certainly is. My recent trip to Chile (five stars, had a blast) resulted in about 4000 new photos that needed a bit of work. To make matters worse, I still needed to edit the album of my summer holiday with Alma. At least now I had the time to dive into this properly.
So what did I do first? Start working on my storage and backups, of course. Over the past ten years or so, my collection of data has steadily grown to a few terabytes, most of which entails photos and videos. I am not one to easily throw away data, which has made it progressively more challenging to manage my storage of those data.
Thus far, I have been managing with two external HDDs, a backup of all of my raw photos and videos to TransIP Stack, and all sorted material to Google Photos, iCloud, and YouTube. Keeping everything in sync proved to be a challenge. As a result, I didn't always keep proper backups. I had a bit of a scare recently when Veracrypt failed to decrypt my primary HDD, and although I managed to fix this, I resolved to set up a better system for myself.
Hardware setup
After some deliberation, I got a NAS with four disks that I installed at my office. I set up three disks in RAID5, with the last disk as a hot spare. For those who don't know, in a RAID5 storage pool, one disk can break without you losing any data. The NAS I bought (Synology DS1522+) will automatically start using the hot spare in case that happens and bring the fault tolerance back up to one disk. From here, I can periodically (manually) create back-ups to an external HDD I keep at home. I also sync the most important data (sorted and edited photos and videos) to Google's and Apple's clouds with Synology Cloud Sync.
While my RAW photos are stored on the NAS, Lightroom needs its catalog to be on a local device to work properly. I use Synology's Drive Server and Drive Client to automatically sync my Lightroom catalogs between my laptop and the NAS. It might be quicker to keep a local copy of the photos as well, but as it stands, the read/write speed isn't the bottleneck in my editing process.
Is it perfect? No. Two disks could fail at once, my NAS could get stolen, I could lose the encryption keys, or Utrecht could get nuked. Is it good enough for me? Yes. It provides a happy medium between certainty and convenience. In my old situation, the certainty was affected by the inconvenience of copying data, which caused me not to make backups as often as I should have. For now, I am happy with my setup.
Remote access with Tailscale
After setting up the hardware and transferring my data to the server, I had to ensure I could access the server from anywhere. The easiest solution for this seemed to be Tailscale, which lets you set up a virtual private network (VPN). Using Tailscale saved me the hassle of port forwarding, which probably wouldn't work without the appropriate permissions for the network in my office building.
The NAS, my laptop, phone, and home computer are now all part of the VPN, so I can access all devices as if they were connected to the same WiFi. This doesn't only work for accessing all of my photos but also for my next hobby project: running a Plex media server.
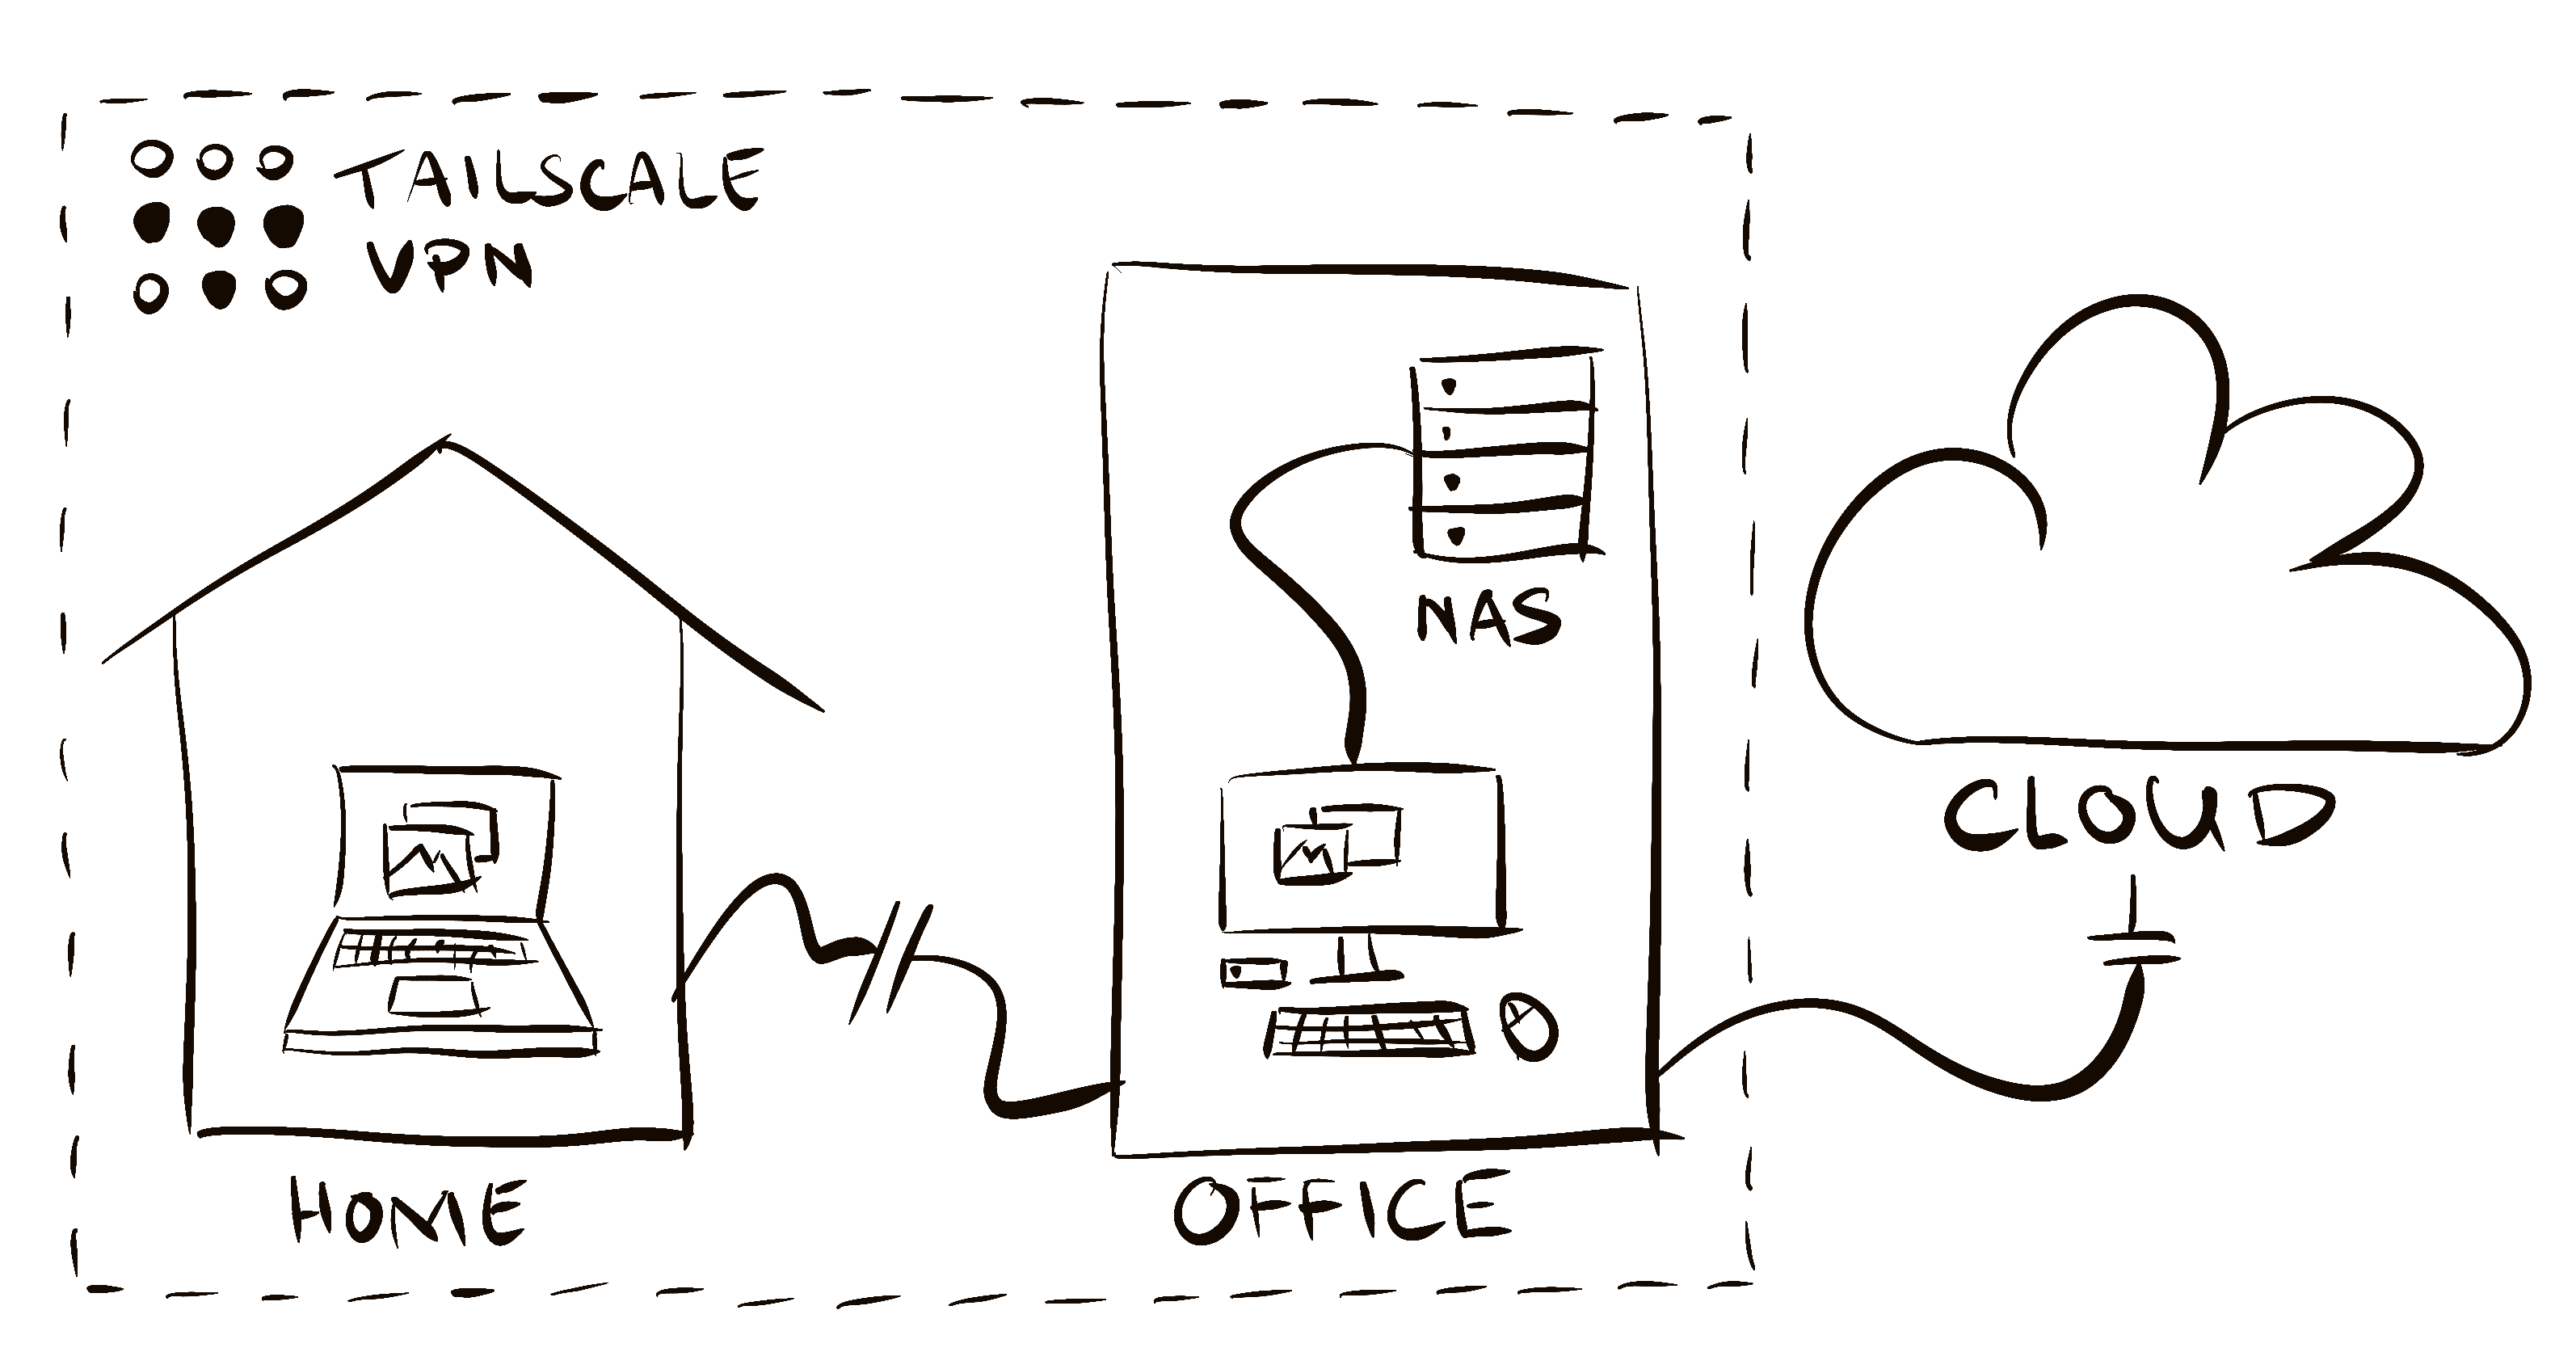 Visual representation of my new setup
Setting up Tailscale was surprisingly easy: I created an account, downloaded the app on all my devices, and was good to go. The only time I used my CLI was when generating a TLS certificate. While this step was not strictly necessary, it prevents the annoying "this connection is not secure" warnings when accessing the virtual desktop environment of the NAS from my browser.
Step-by-step instructions
In case you're interested in creating a similar setup, here's a step-by-step guide. It's based on Synology hardware, but a similar approach should be feasible with any NAS.
- Install the disks, plug in your NAS, and follow the installation wizard.
- Create a storage pool with your required specs (for me: RAID5 with one hot spare).
- Create a shared folder (and enable encryption).
- Set up Synology Drive Server on the NAS and Synology Drive Client on your computer to sync your Lightroom catalog (or catalogs) between the machines.
- Set up Synology Cloud Sync to create backups of your data to the clouds you want (I only did this for my most critical data to mitigate costs).
- Create a Tailscale account.
- Install Tailscale on the NAS and any devices on which you want to access your data.
- In the Tailscale admin console, navigate to DNS, generate a Tailnet name, and enable MagicDNS. This way, you can access devices using machine names instead of IP addresses.
- On the DNS page, also enable HTTPS.
-
SSH into the NAS from your terminal and run
sudo tailscale certto generate a public certificate (I enabled SSH for this and disabled it afterward).
That's all there is to it! Again, I was pleasantly surprised by how easy this was to configure. Especially the networking aspect with Tailscale was far more straightforward than I had anticipated. Now there is nothing to hold me back from finally starting on my photo backlog!
Unless... It could be fun to set up Plex first...
Disclosures: This blog post is —sadly— not sponsored by Synology or Tailscale. If anyone from either company is reading this: give me a call!

Rob de Wit-Liezenga
I like working with data and tech to help people solve problems. Although I am comfortable with the "harder" aspects of data engineering and data science, I firmly believe that tech shouldn't be self-serving. What I like doing best is connecting with people, sharing knowledge, and discovering how data can help improve life and work.
linkedin.com/in/rcdewit